Puzzle:Bergmann Hydroelectric Powerplant
Work in progress, by User:Scarchu.
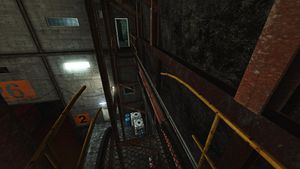
After the raft ride, cross to the other shore and find B4 door and go through it:

Go straight ahead until you see this door:

Go through it and find a key on the wall:

Go back, after the metallic stairs there is a door, go through it and find this door:

Go down, find the four generators and start G1, G3 and G4. DO NOT start G2:


Because G2 is broken, but we need to override it, use the panel, click on G2, then click override:

If you done everything as it should, you must see this:

Turn on the switch on the left to connect the generators to the grid:

Go back to the upper floor and find this control panel:

Click on SETTINGS -> RED BUTTON -> GREEN BUTTON -> WARNINGS -> RED BUTTON -> RED BUTTON:
 ->
->  ->
->
 ->
->  ->
->
 ->
-> 
If you done everything correctly, you will gain access to some locked before flood doors and you can make some pictures. Here will leave the exploration to you and will continue further. Go to the generators room and exit through door A2:

Follow the path and you will reach a place of choice. With the key found earlier you can unlock the metal bars door and follow that path, or you can open flood door A3 and continue from there:

== Path 1 ==
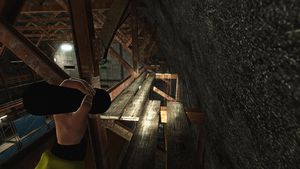
Unlock the metal bars door, do a lot of jumping and reach a room with a switch. Switch it on and go through the door:

Find a container/office with dynamite in it and grab a stick of dynamite:

Find the place for the dynamite and place it:

Go back into the office, activate the counter with the remote and HIDE!:

After the dynamite blew, go through the hole it's made:

We need this exit:

Play around with the crates so you can reach the exit path:
- wrong path:

- correct path:

And use the Exit door on the right:

== Path 2 ==
Open flood door A3 and go through it. Eventually you will reach a room with a fuse box on the wall with two placed fuses:

Grab the third fuse from the metal wardrobe and place it on the 4th* position!:

Go to the opposite wall and activate the switch**:

You now will be able to open the near door. Go through it and go to the door at the end of the long corridor:

Got through it and turn immediately left! There you will find a fuse:

Grab it and go back to the fuse box to place it at third position***:

Go back where you found the fuse. You now must reach this door:

== REMARKS ==
- - You can choose to put the fuse in third position at first. Once the fuse in place, you can't change it's position. This will unlock the metal bar door mentioned further. In this way you must go and blow up the dynamite mentioned in PATH1. After that you can grab the fuse from the location in PATH1, and bring it to the fuse holder, or continue and use the exit from PATH1.
- - There are two switches (in PATH1 and PATH2), doing the same thing. When one of the switches is already ON, you can't move the other and vice-versa.
- - This will allow you to go to the constructions site with the dynamite and make some photos before exit the level.